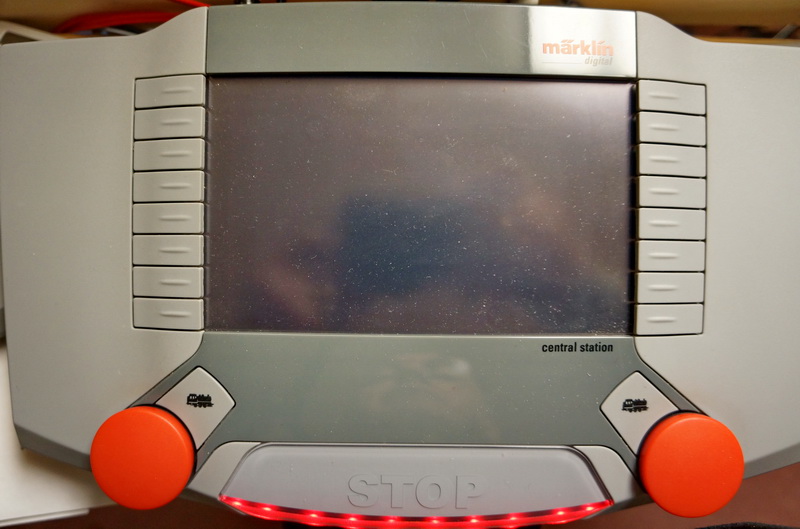
CENTRAL STATION 1
FIRST REPLACED BY THE CENTRAL STATION 2
AND NOW THE CENTRAL STATION 3 AND 3 PLUS.
I have used the original Marklin Control Units, the IB, the ECOS systems to control my old layout. Without a doubt the Central Station does all that these did and more, and in a user friendly way. I would never go back to the IB, which I loved. Anyone interested in a complete IB setup or an ECOS or the Eckert power supply just email me at sfanelli3@optimum.net.
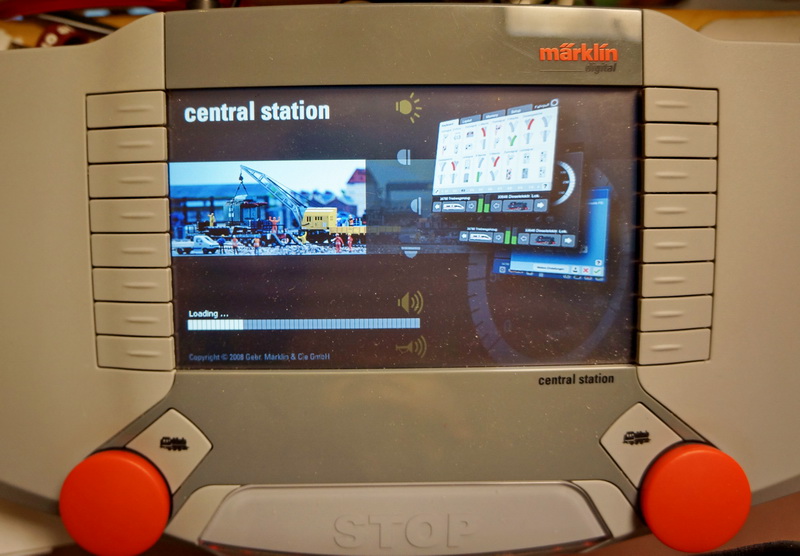
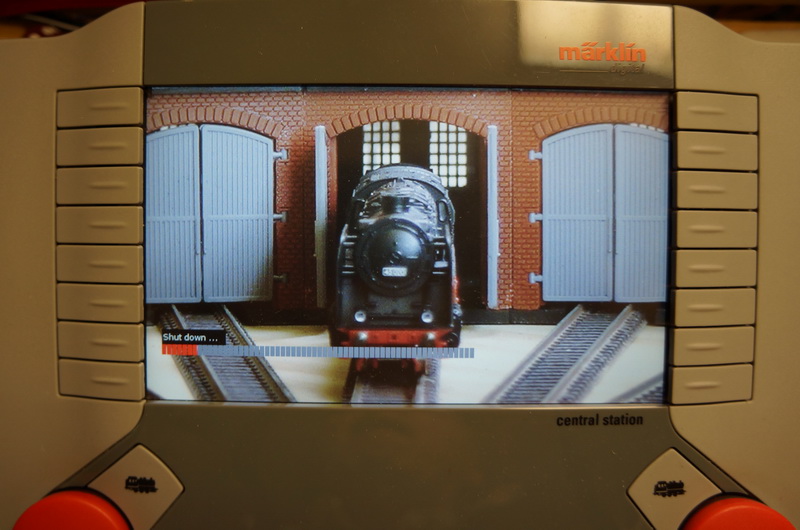
The Central Station takes a bit of time to open but that is because it is accessing all the stored data for loks, turnouts, signals, and memory.
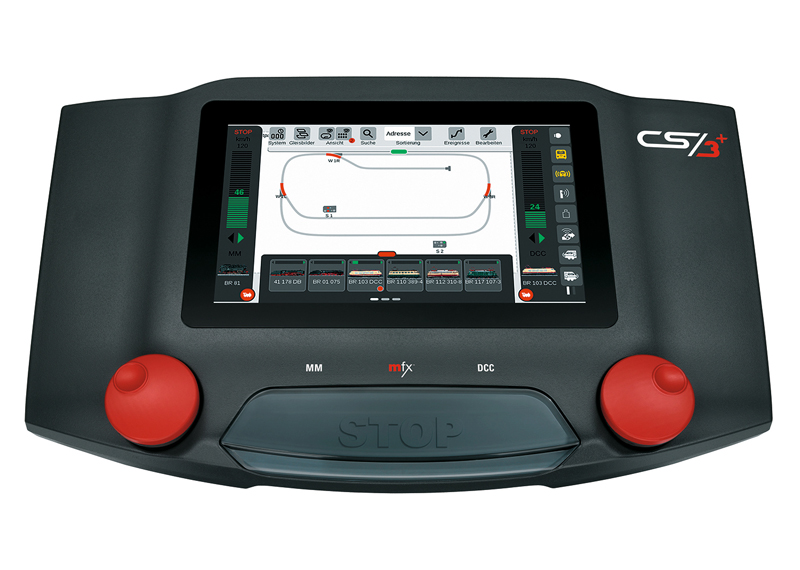
The Central Station 3 and 3 Plus are replaced all of my control devices. They are powerful controllers that allow complete train control using a number of different methods to do so - Direct train control with as many as 32 functions; train control from track diagrams, train control using memory and routes.
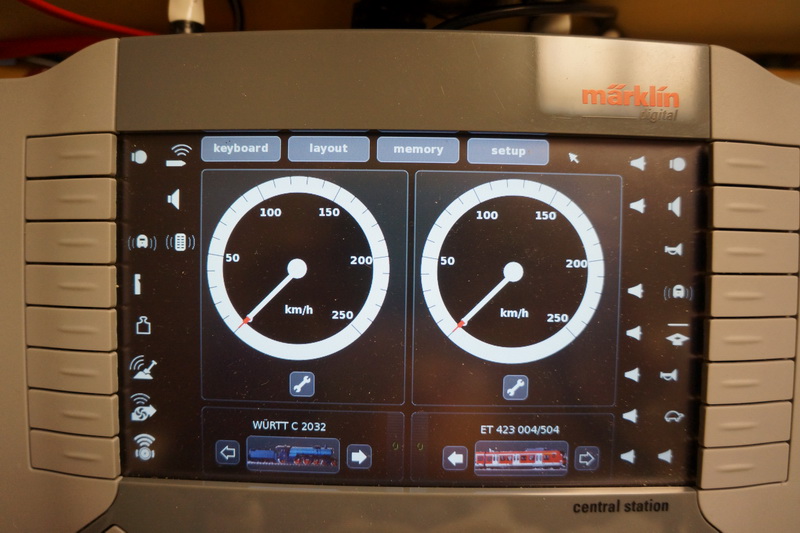
The Control mode of the Central Station (CS) is the first screen to appear. This mode controls the loks and all of their functions. You can access loks by pressing the lok icon adjacent to the red control knob. The contol knob regulates speed and by depressing it you control change the loks direction. Only two loks can be controlled with the CS but using two Mobile Stations, as I do, allows the direct control of four loks. Add to these the direct control of up to eight loks on my iPad bringing the total of loks that I can directly control up to twelve. If I also use the Control 80 that is attached to the CS I can directly control thirteen loks on the layout. And if I add control with my iPhone I can directly control fourteen loks.
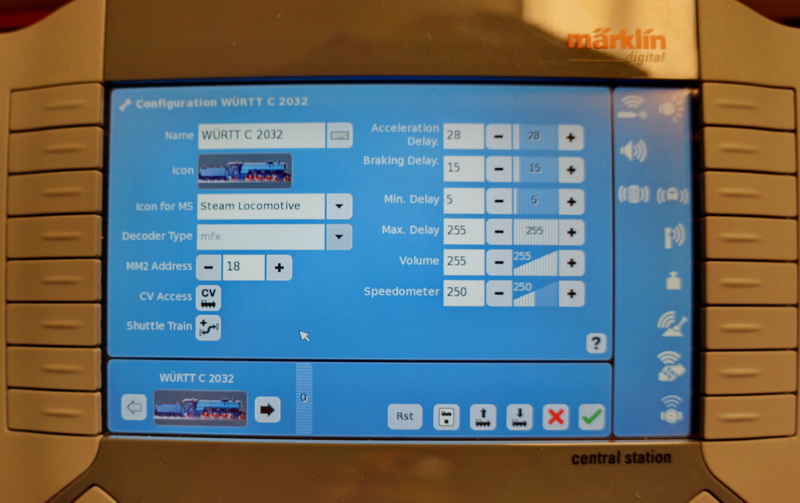
Using the stylus that is part of the Central Station, or a mouse which I use, or pressing the tabs on the outer edges of the CS you can control the functions. The icons for functions are changeable. Note the picture of the loks with their name. The arrows on either side control direction and indicate in which direction the lok is traveling. Clicking on the lok picture allows you to bring up all the loks that I have programmed into the CS. The CS recognizes any mfx decoders and transfers all the functions, the lok name and the lok picture/icon to the data base on the CS. (See first picture below of the Icon screen below from which you can choose a lok.) The wrench icon takes you to a lok set up screen that allows you to change set functions and function icons as well as a number of adjustments including volume, acceleration/decelleration speeds, braking settings, etc. (See second picture below of the Lok Setup screen.) You can create a new lok by clicking on the arrow next to the Create window in the upper right and you will be asked if you want to use the data base or create the lok set up for a lok not in the data base. For the latter you must know the decoder number. If you have changed the factory setting for a lok, the setup screen will allow you to enter it as a lok not found in the data base. The CS will search its data base for a lok if you know the Marking catalog number.
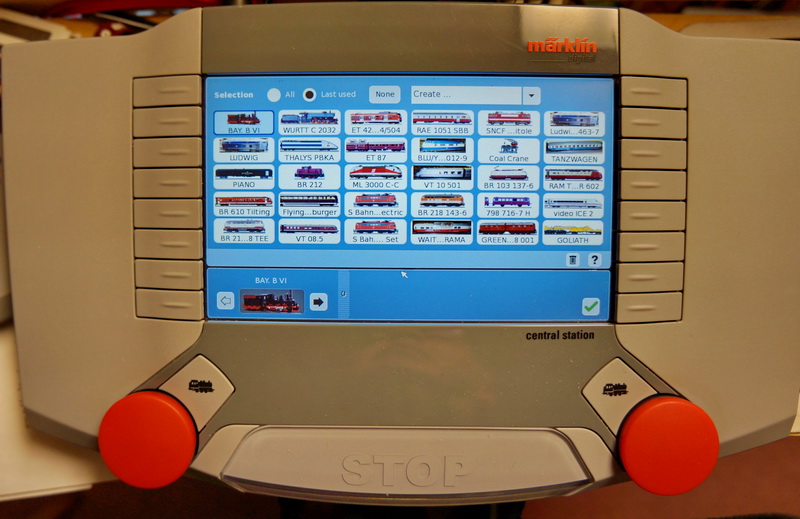
The lok icons or pictures are part of the data base on the Central Station. Each new mfx lok will have an icon associated with it. However, if there is no lok icon for a lok you can create one by doing the following:
1. With a digital camera take a picture or pictures of the lok(s). A plain background works best.
2. In a photo editing program crop the photo(s) so that only the lok shows and resize the image(s) to 128 by 48 pixels or as close to this as possible.
3. Save the resized photo(s) to a thumb drive of stick drive as a .png file and place it/them in a folder that you create named "icons". Don't include the quotation marks. BE SURE THAT THE FOLDER NAME IS ALL IN LOWER CASE - icons. It is better not to have any other folders on the thumb drive or stick drive.
4. Connect the thumb drive or stick drive to the USB port on the Central Station.
5. Go to the Setup screen and click "Stick Drive" as the source and then click on upgrade and the picture(s) will be added to the data base. You can change icons for any lok in this way. I did it for a BR 218 lok which was in the data base but had the wrong color. I took a picture of my lok and did all of the above and was able to my picture with the lok.
6. On the lok set up screen below you can click on the picture/icon for the lok in the upper left hand corner and the icons in the data base including any that you have added will appear. You can choose the one that you want and click on it. You can also name or rename the lok by clicking on the icon for the keyboard.
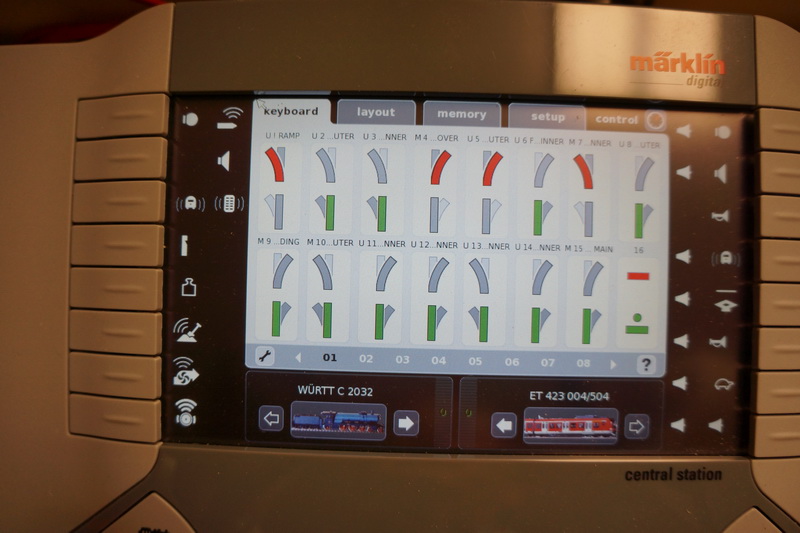
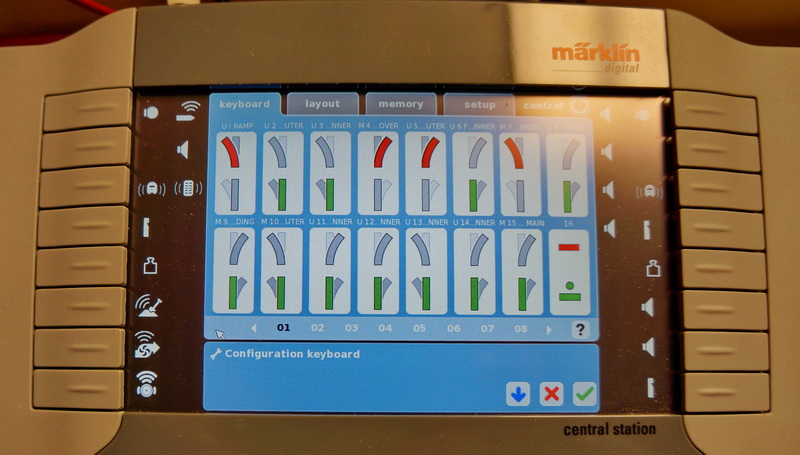
The Keyboard mode allows you to control all of your turnouts, signals, and accessories. The picture shows turnout set in various positions. Clicking on the grey image changes the turnout to that position. You can name each turnout. (See picture below of the Keyboard Configuration screen.)
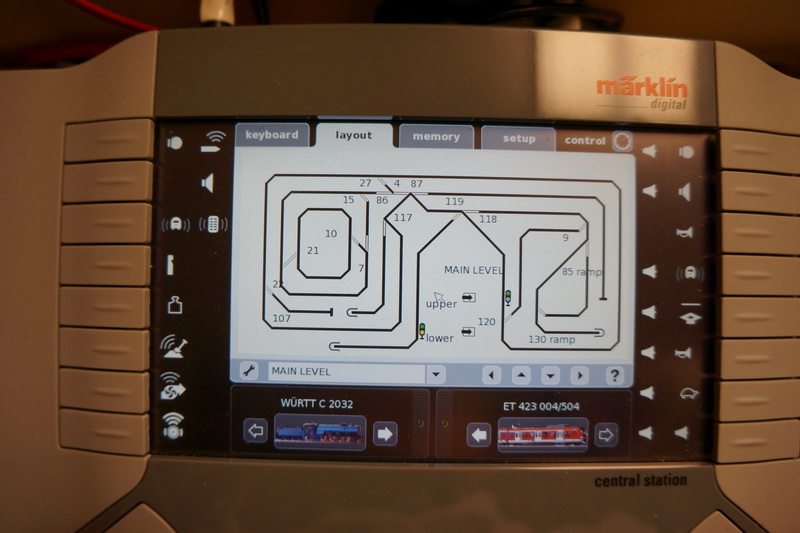
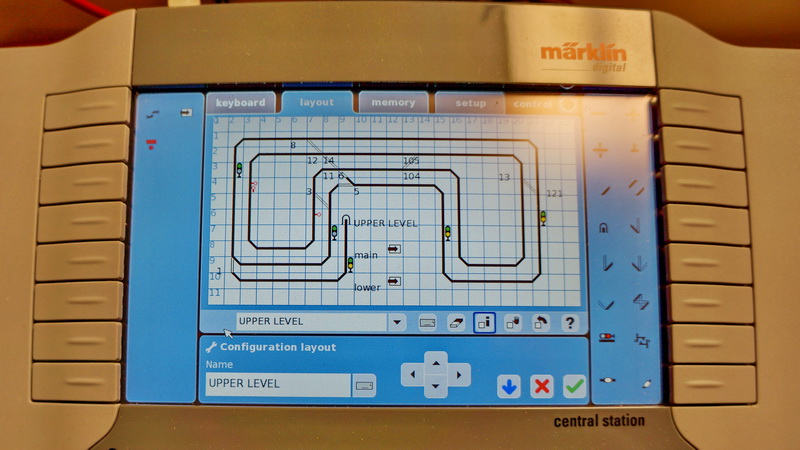
The Layout mode of the CS allows you to draw the layout with turnouts and signals. Clicking on either of these will change the turnout or signal. Note the wrench that takes you to the screen for creating the layout. Next to it is the current layout name. You can scroll down to see other layouts. If your layout takes up more than the screen size you can move right or left, up or down with the arrow keys which are to the right of the current layout name. (See picture below of the Layout Drawing screen. The drawing tools for track, turnouts and signals are on the right side of the screen.)
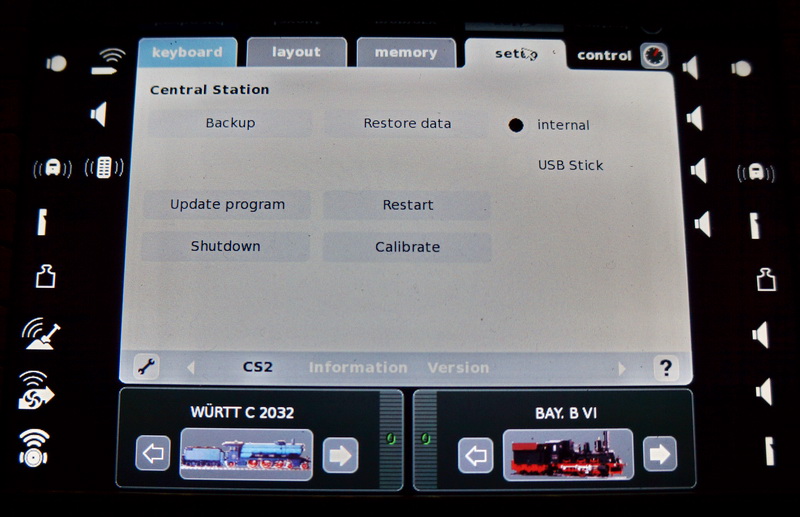
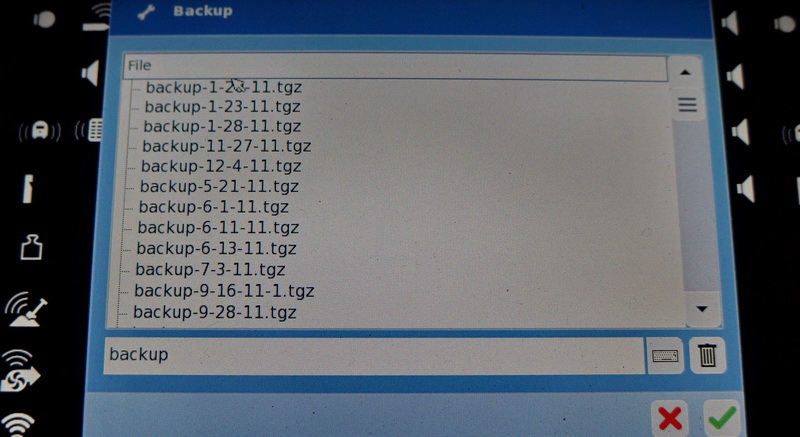
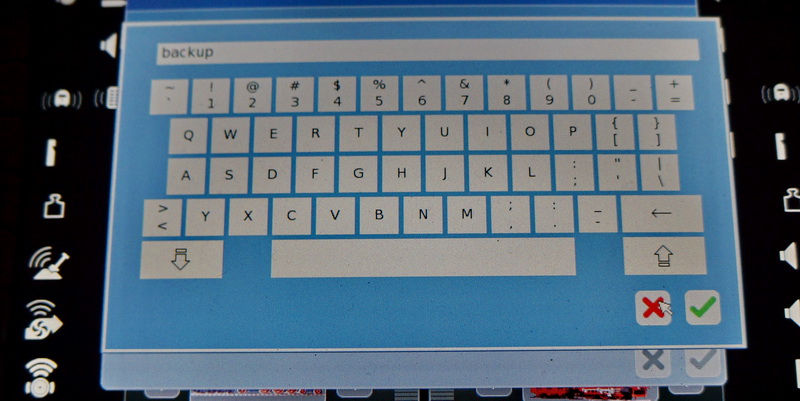
The Setup screen allows you to exit the program which saves all the datat. It also allows you to back up your files in case of a problem. I do this internally which saves it on the CS unit and externally using a thumb drive or stick drive. You can never save in enough places. I do that frequently and I add to each file's name the date so that I can find the most recent "tzg" file - the file type used by the CS. You can restore from a previous file using the Restore function. The Setup screen allows you to update the CS software and firmware when necessary. When necessary you can recalibrate the CS if your stylus is giving you problems. I have never had to do this. The CS has a great keyboard that you can use to add text to layouts, give loks names, name turnouts, name files, etc.
Closing the CS unit using the Setup screen will save all the changes and data you have entered during the session. Even if no changes are made it is always best to shutdown the program using the Setup screen rather than just shutting off power to the unit.
Click here to return to Home Page.